Overview
Google Authenticator is used for Mutli-Factor Authentication (MFA) and can be downloaded to any mobile device. If a user cannot access a mobile device, they can also use a web browser.
Each user can only have one registered authenticator application. If the user already has the Google Authenticator setup within a mobile app, setting up the browser functionality will remove that access. They cannot sync and work together.
Instructions
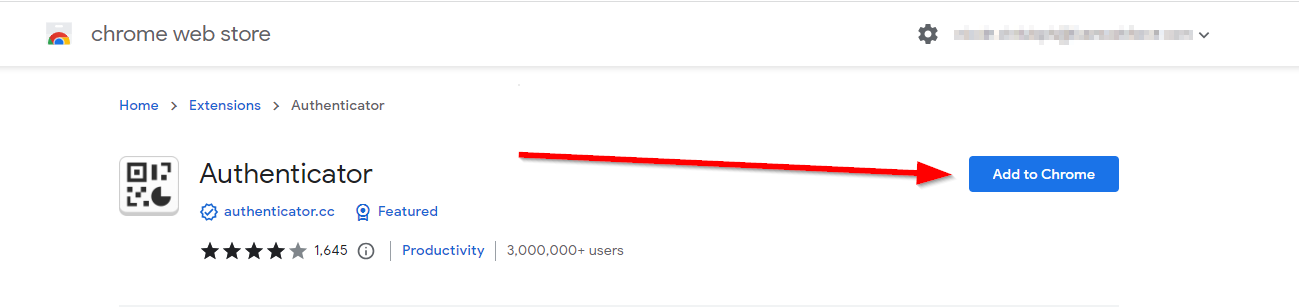
- In your preferred search engine, look for the Google Authenticator app in whatever browser you are utilizing. For example, if you are using Chrome as your browser, search for Google Authenticator in Chrome.
- Once you have found the Google Authenticator app, click "Add to Chrome"
- You will get a popup and will need to click on Add Extension
- Once the extension is added, it will show up in your toolbar. It may be hidden inside the extensions icon here:
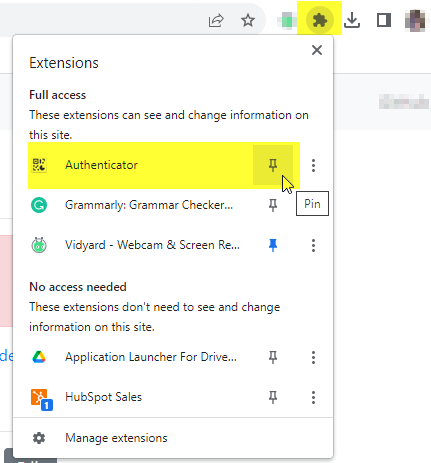
- Pin the Authenticator app using the push pin icon.
- Go to your login in the Fuse system. When logging in, the option for Two-Factor Authentication using an Authenticator App will show you a QR code to connect to your new extension.
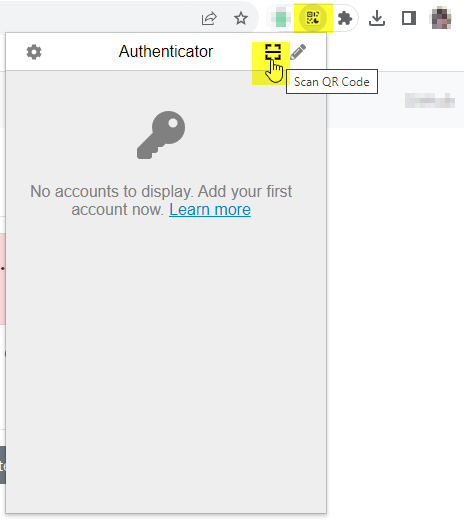
- Click on your Authenticator extension and the Scan QR Code icon
- This web browser extension will instruct you to use your mouse to scan the QR code on your Fuse system screen. This connects your Fuse login to the web browser and the authentication app installed.
- Once this is completed, the Authenticator app will include your authentication code to log in any time you click on the icon!