Overview
Vendors are required for many different items in the system, mainly:
- A check or ACH payment tied to a payroll deduction (i.e., child support, garnishment, or HSA contributions).
- As carriers in Benefit Plan Reporting or Integrations.
- Other optional payroll reporting functionality
Adding a New Child Support Vendor
- Go to Settings > Payroll Setup > Vendors. Review this report to ensure a new vendor is required.
- Click the Add New Vendor on the Top Right
- Choose the correct Child Support agency using the Master Vendor drop-down.
- Enter the Name of this Vendor
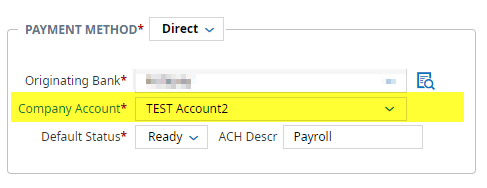
- Review the company bank account used for this vendor
- Press Save, and your new vendor is now available to tie to employee child support deductions.
- Multi-EIN clients will need to add the correct EIN to their vendor after the first time it is saved.
- If you receive an error message regarding the Originating Bank, please contact support@fuseworkforce.com for help.
Adding a New Vendor (not Child Support)
- Go to Settings > Payroll Setup > Vendors. Review this report to ensure a new vendor is required.
- Click the Add New Vendor on the Top Right
- Enter the Vendor Name
- If this vendor needs to be used for a Benefit Plan, mark the Used for HR checkbox.
- Enter the Payee Name, and choose a Payment type:
- No Payment: this vendor will not process payments and is for reporting only.
- Check - One per case, Check - All: this vendor will process a check payment. Be sure to fill in the address information on the right to ensure it prints on the check.
- ACH - Employee Level: this vendor will open up ACH routing and account number information to be entered on the employee deduction level. This is typically used for HSA funding.
- ACH - One Per Case, ACH - All (CCD), ACH - All (CTX): this vendor will have one ACH routing and account number added at the vendor level for payment. You must contact your vendor for the details behind these funding methods.
- Review the bank account used for this vendor (skip this step for No Payment types)

- Press Save and your new vendor will now be available to tie to employee deductions or benefit plans as needed.
- Multi-EIN clients will need to add the correct EIN to their vendor after the first time it is saved.
- If you receive an error message regarding the Originating Bank, please contact support@fuseworkforce.com for help.